In the previous post, I showed you how to create a new Android project. I also showed you how to configure an Emulator to run Android applications. In this tutorial, we will go into more detail and we will edit the default text when creating a new project from “Hello World!” to “Hello from Huong Dan Kotlin” and “Hello from Khanh”!
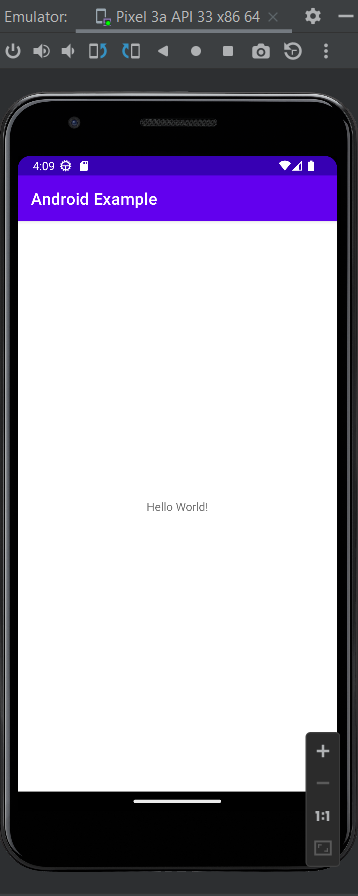
When our application first starts up the project and runs, it will display the text “Hello World!” as follows:
As I said in the previous tutorial, the MainActivity class will take care of displaying the above interface and it uses the activity_main.xml file in the project’s res/layout folder to do this.
When you click on this file activity_main.xml, by default you will see the design interface displayed as follows:
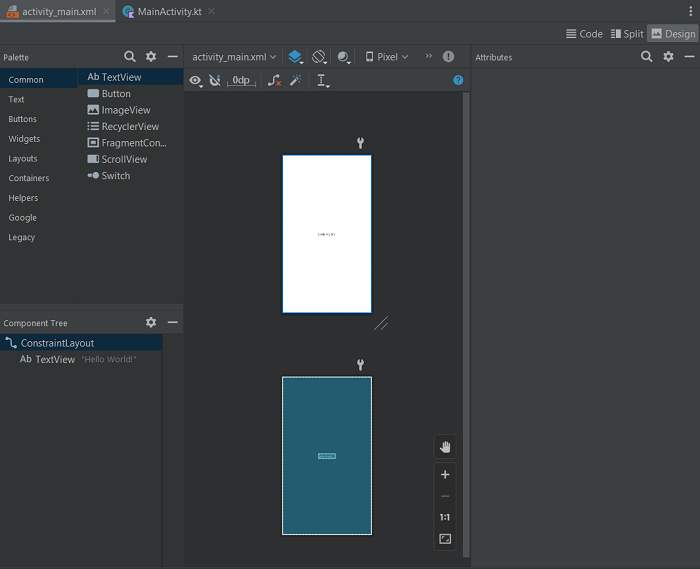
You can switch to Code view (only displaying the content of the activity_main.xml file) or Split (just seeing the content of the activity_main.xml file and seeing how the interface will be displayed at the same time).
As I said in the previous tutorial, Android Studio allows us to drag and drop to design the interface. You can drag and drop components in the Palette to create an interface for your application. Android Studio will automatically generate the content of the activity_main.xml file based on what we drag and drop, configuring the interface components.
The content of the current activity_main.xml file is as follows:
|
1 2 3 4 5 6 7 8 9 10 11 12 13 14 15 16 17 18 |
<?xml version="1.0" encoding="utf-8"?> <androidx.constraintlayout.widget.ConstraintLayout xmlns:android="http://schemas.android.com/apk/res/android" xmlns:app="http://schemas.android.com/apk/res-auto" xmlns:tools="http://schemas.android.com/tools" android:layout_width="match_parent" android:layout_height="match_parent" tools:context=".MainActivity"> <TextView android:layout_width="wrap_content" android:layout_height="wrap_content" android:text="Hello World!" app:layout_constraintBottom_toBottomOf="parent" app:layout_constraintEnd_toEndOf="parent" app:layout_constraintStart_toStartOf="parent" app:layout_constraintTop_toTopOf="parent" /> </androidx.constraintlayout.widget.ConstraintLayout> |
In addition to the root tag <androidx.constraintlayout.widget.ConstraintLayout> that defines the layout for the application, as you can see, we also have a <TextView> tag that defines the content of the text line “Hello World!”.
In short, about layout in Android application, that is how Android application components will be displayed. Imagine, an Android application can run on many different devices, and each device has a different size. So how will the display of the position of each component in an interface be, and how will the distance between the components be? Which layout you use will determine the display for these components! Android SDK defines some default layouts like Linear Layout, Relative Layout, or Constraint Layout that we are using for our example in this tutorial. You should learn carefully the types of layout to use correctly for your application!
TextView is one of the components provided by Android SDK, it helps us to display text in Android application. In addition to TextView, we also have Button to display the button, EditText to enter text, …
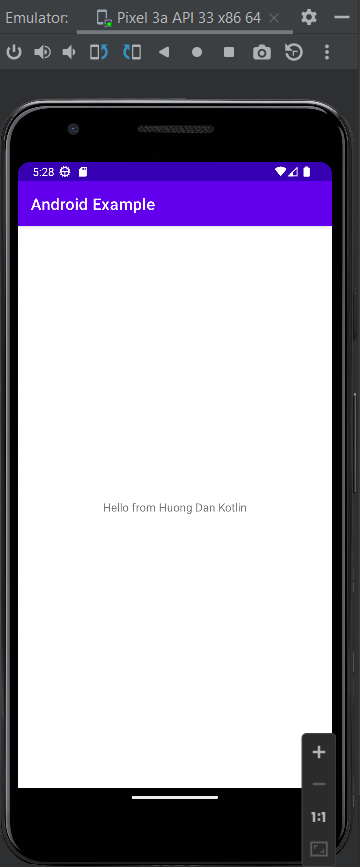
Depending on the component, we can define the length, width, color, and some other properties. For the TextView component that we are using, as you can see, there are some properties related to the layout constraint with the parent. You can change the text displayed for this component using the android:text attribute. As I said above, I will change the displayed text to “Hello from Huong Dan Kotlin” guys!
Run the application again, you will see the following results:
To work with a component in an Android application, in addition to designing the interface for it in the application’s Activity XML file, we can also use the code to add events and behaviors according to our needs. But before we can do this, for each component, we need to define the ID for that component. In the code, we will access that component using this ID value.
For example, for the TextView component in our example, we could define an ID using the android:id attribute like so:
|
1 2 3 4 5 6 7 8 9 10 11 12 13 14 15 16 17 18 19 |
<?xml version="1.0" encoding="utf-8"?> <androidx.constraintlayout.widget.ConstraintLayout xmlns:android="http://schemas.android.com/apk/res/android" xmlns:app="http://schemas.android.com/apk/res-auto" xmlns:tools="http://schemas.android.com/tools" android:layout_width="match_parent" android:layout_height="match_parent" tools:context=".MainActivity"> <TextView android:id="@+id/tvHelloWorld" android:layout_width="wrap_content" android:layout_height="wrap_content" android:text="Hello from Huong Dan Kotlin" app:layout_constraintBottom_toBottomOf="parent" app:layout_constraintEnd_toEndOf="parent" app:layout_constraintStart_toStartOf="parent" app:layout_constraintTop_toTopOf="parent" /> </androidx.constraintlayout.widget.ConstraintLayout> |
In code, we can access this TextView component using the following line of code:
|
1 2 3 4 5 6 7 8 9 10 11 12 13 14 |
package com.huongdankotlin.androidexample import androidx.appcompat.app.AppCompatActivity import android.os.Bundle import android.widget.TextView class MainActivity : AppCompatActivity() { override fun onCreate(savedInstanceState: Bundle?) { super.onCreate(savedInstanceState) setContentView(R.layout.activity_main) val tvHelloWorld = findViewById<TextView>(R.id.tvHelloWorld) } } |
In the Android SDK, the R class will take care of all the information related to the application’s resources. From images, sounds to application components, we can all access them through this R class. For components, we use their IDs to access them through the R class.
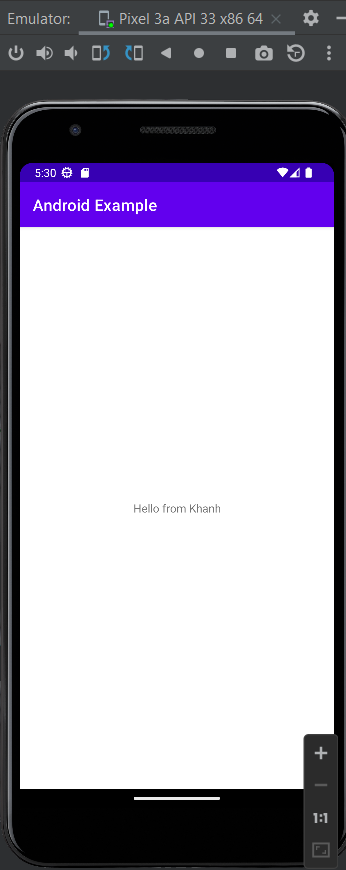
Once you have access to the component, you can do anything with that component. For example, I can change the displayed text to “Hello from Khanh” as follows:
|
1 2 3 4 5 6 7 8 9 10 11 12 13 14 15 |
package com.huongdankotlin.androidexample import androidx.appcompat.app.AppCompatActivity import android.os.Bundle import android.widget.TextView class MainActivity : AppCompatActivity() { override fun onCreate(savedInstanceState: Bundle?) { super.onCreate(savedInstanceState) setContentView(R.layout.activity_main) val tvHelloWorld = findViewById<TextView>(R.id.tvHelloWorld) tvHelloWorld.text = "Hello from Khanh" } } |
The result when I run the application again will be as follows: