To run Android applications, we can use an Emulator or a real device. In this tutorial, I will show you how to install the Emulator first!
By default, maybe when creating a new Android project, Android Studio will set up an Emulator for us. Our example is as follows:
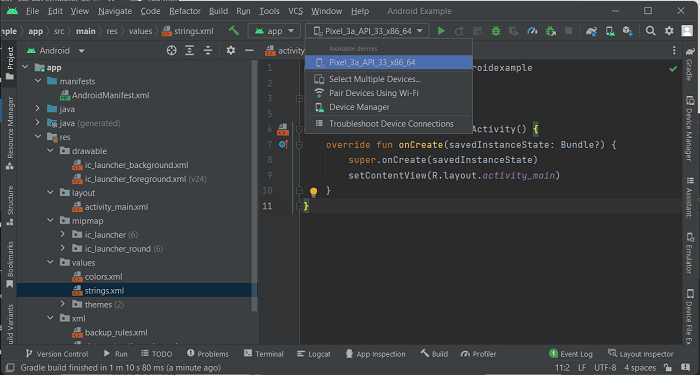
But if you don’t want to use this Emulator, you can install a new Emulator.
Please select Device Manager in the application menu above to get started! The Device Manager window will display on the right as follows:
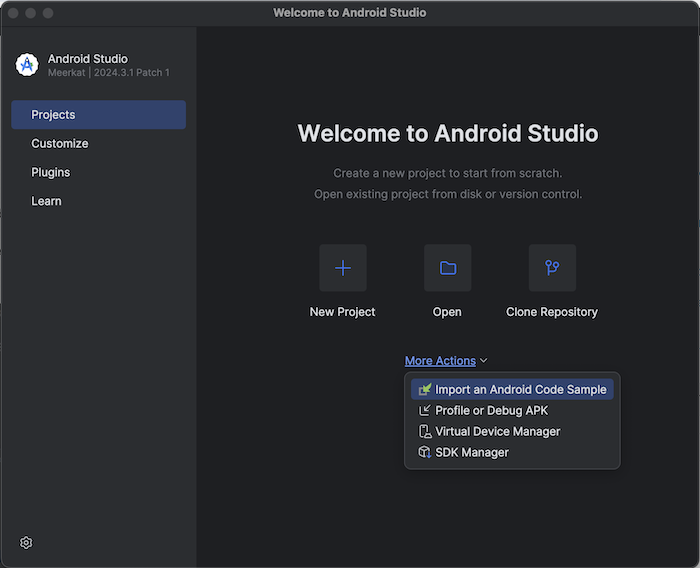
Or you can also, on the Welcome to Android screen when you first open Android Studio, select More Actions and select Virtual Device Manager, as follows:
The Device Manager window will also display as follows:
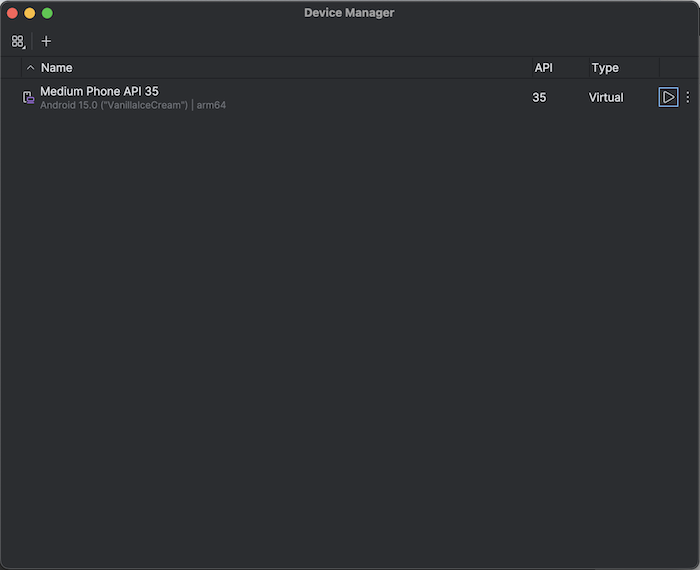
Please click on the + sign at the top left to add a new Device! My results are as follows:
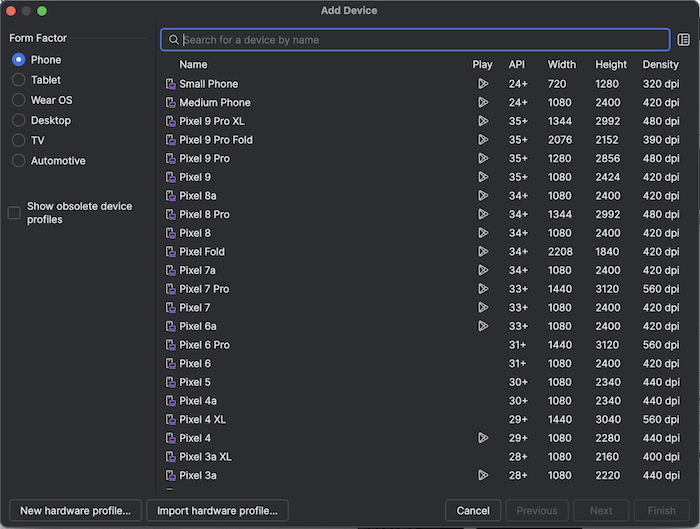
Similar to when creating a new Android project, we can also install the Emulator for different devices such as phones, tablets wearOS, TVs or Automotive. In my example, I will only use phones!
After selecting the device, you need to choose the specific device that you want to run your Android application. Depending on your needs, choose the appropriate one. There are devices that will support the Play Store and you should choose these devices like me:
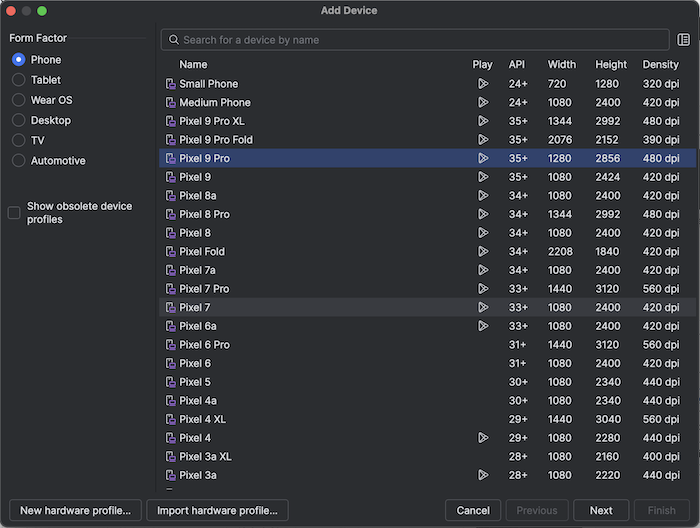
Click on the Next button, guys!
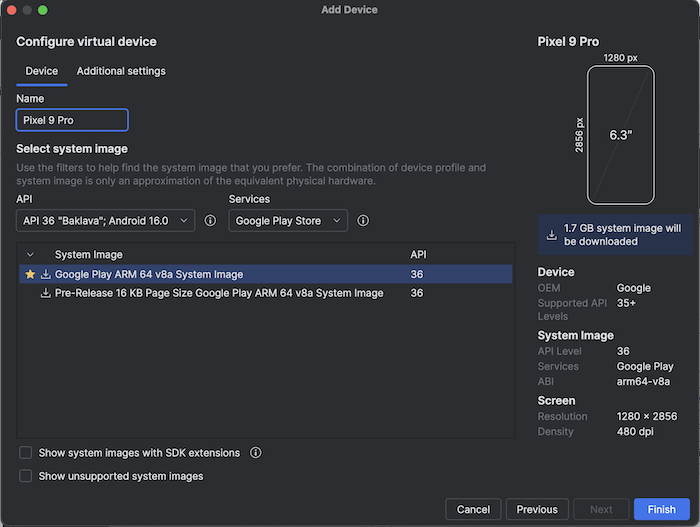
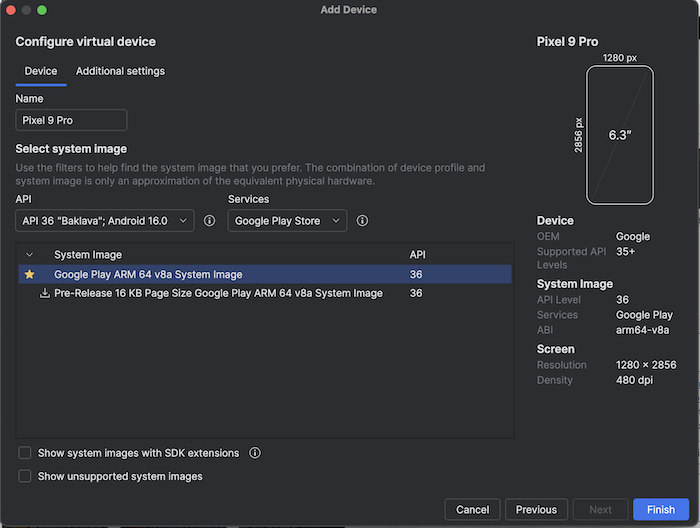
You need to download the System Image for the Android operating system that you will run the application on. Depending on your needs, choose the appropriate one!
Here, I will choose Android 16 operating system and then click the Download button next to the text “Google Play ARM 64 v8a System Image”. The download process will take place as follows:
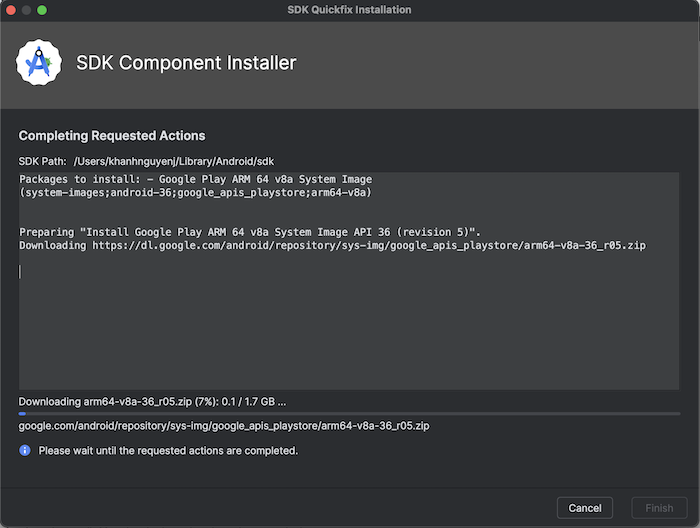
Please click the Finish button after the download process is complete!
Result:
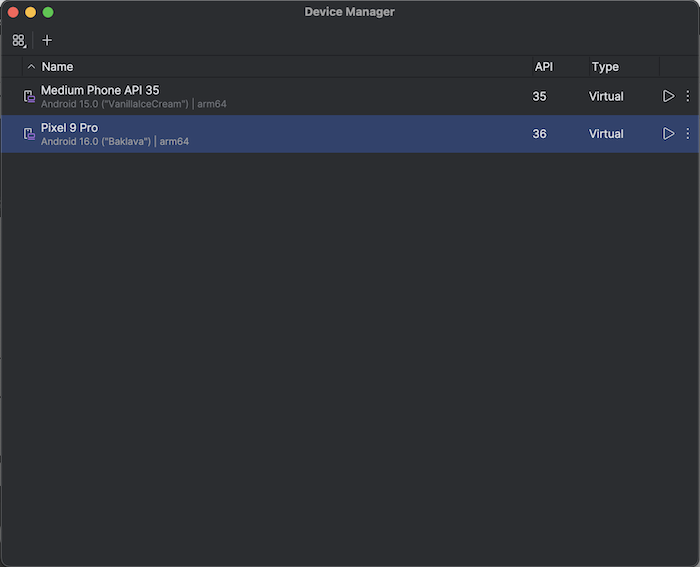
From now on, you can use this Emulator to run Android applications!